Dorset buttons
Hi all, today I came very close to finishing my cape. I wanted a pin / fastener for it. The last cape I made I used a pin but find it fiddly to do up so thought I would try something a little different.
I have used Dorset buttons in the past as they are really good with hand spun. When you make something that needs a pin / button and you have knitted it in hand spun it can be very difficult finding a button to match. Dorset buttons are a very traditional button made in England. Please feel free to Google them to find out the history. I use just one of the many versions available to try. I have found them very quick and easy to make and I tend to make all my buttons instead of buying them as I find I prefer them.
Anyway here goes.... First find a brass curtain ring slightly smalller than the size you need. Other metal rings, or indeed bone can be used. But please remember that it must withstand the stress of the warp and also that it mustn't rust / corrode if washed with the garment.
Cut a length of the yarn you want to use, Cut it very long as you need to make sure you have enough to get into the weaving as it can be hard to join in a new thread before this stage. Using this thread , thread a darning needle.
Now using button hole stitch work around the ring covering the end of the thread as you go. Make sure you snug up the stitches as tight as possible.

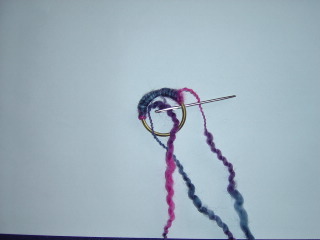
Once the ring is completely covered join the last stitch to the first by pushing the needle under the thread of the first stitch. Now turn the "ridge" of the button hole to the inside of the ring. Using the thread left procede to "warp" the covered ring. Go from top to bottom and then work around the ring much like creating spokes of a bicycle.

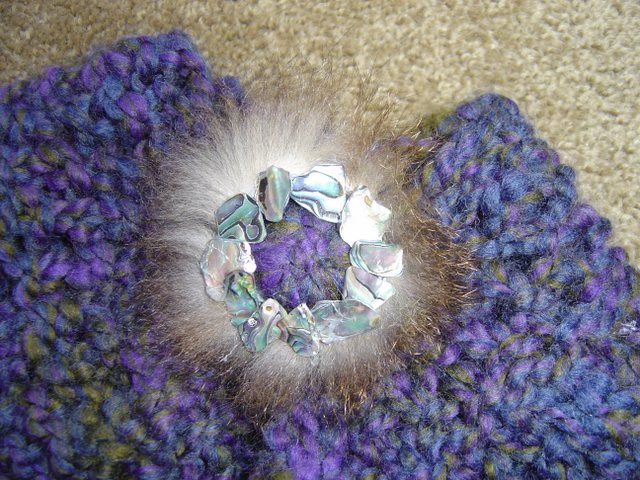
When you have wrapped the warp around the whole ring it should look like the above. It can take a few "goes" to get the placement right. It can also be a little confusing as the warping threads can show from underneath, and they look crooked but just keep concentrating on the top.
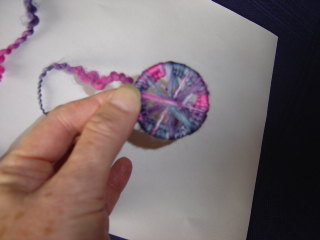
When you have reached this stage you need to do a cross stitch at the centre. When doing this pull up tight to get the threads to form a more even warp. Do the cross over both the top and bottom threads this way pulling them together.

Now bring up the needle from behind , between two of the warp threads. You will from now on treat the front and back threads as one.
You will now weave on these threads. You will weave by using a back stitch. That is you will take the needle back over one and then forward under two. Repeat.

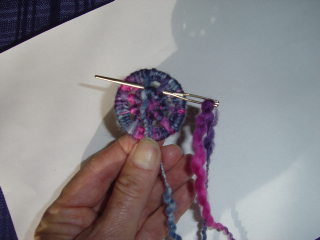
You keep weaving around and around until the warp is covered. Make sure you weave until the centre is completely filled and firm. Keep any thread at the back to attach your button.


I have a black "chop stick " which was designed for putting in the hair. My DP drilled some small holes in the top through the side. I will use these to attach my button to the top thus hopefully making a pin to fasten my cape.

I hope this is clear! Please feel free to comment and ask any questions. These buttons are mentioned in several books as well.
I have also done some more computer knitting and am close to doing the top of the sleeves on my green jersey.
I have also boiled and reduced the tomato sauce and made more relish. From now on I am just going to pulp and freeze them. We won't have to buy any tinned ones this year!!
Oh well bedtime again. Hope all are well.
Knit on >^..^<
posted by Beverley at 11:40 pm
![]()
![]()
1 Comments:
Thankyou for such a clear lesson. I'm about to finish off a knitted bag and went looking for a nice large button but couldn't find one so this is just great.
I made the last of the zucchinis into tubs of zook/tomato and herbs for the freezer. I'm short of tomatoes this year so I made mine with tins of cheap, chopped up ones.
Robert is preparing to mow the grass and because it is so dry here, that means a cloud of dust will settle everywhere. I shall finish the ironing and then prepare a list of do's for next week.
Hope the cape goes well. Are you saving the finished picture for a winning pic? It sure looks like it could be one, Cheers Gillian
Post a Comment
<< Home